How to Play
Introduction#
RAR Islands is a turn-based island exploration RPG.
Every action you take: moving, gathering, crafting, etc. costs “one turn”. At first glance, the main screen you’ll see when playing is the Journey screen:
On the Your First Steps section you can learn more about the first steps when playing.
For now, let’s explain the screen from top to bottom:
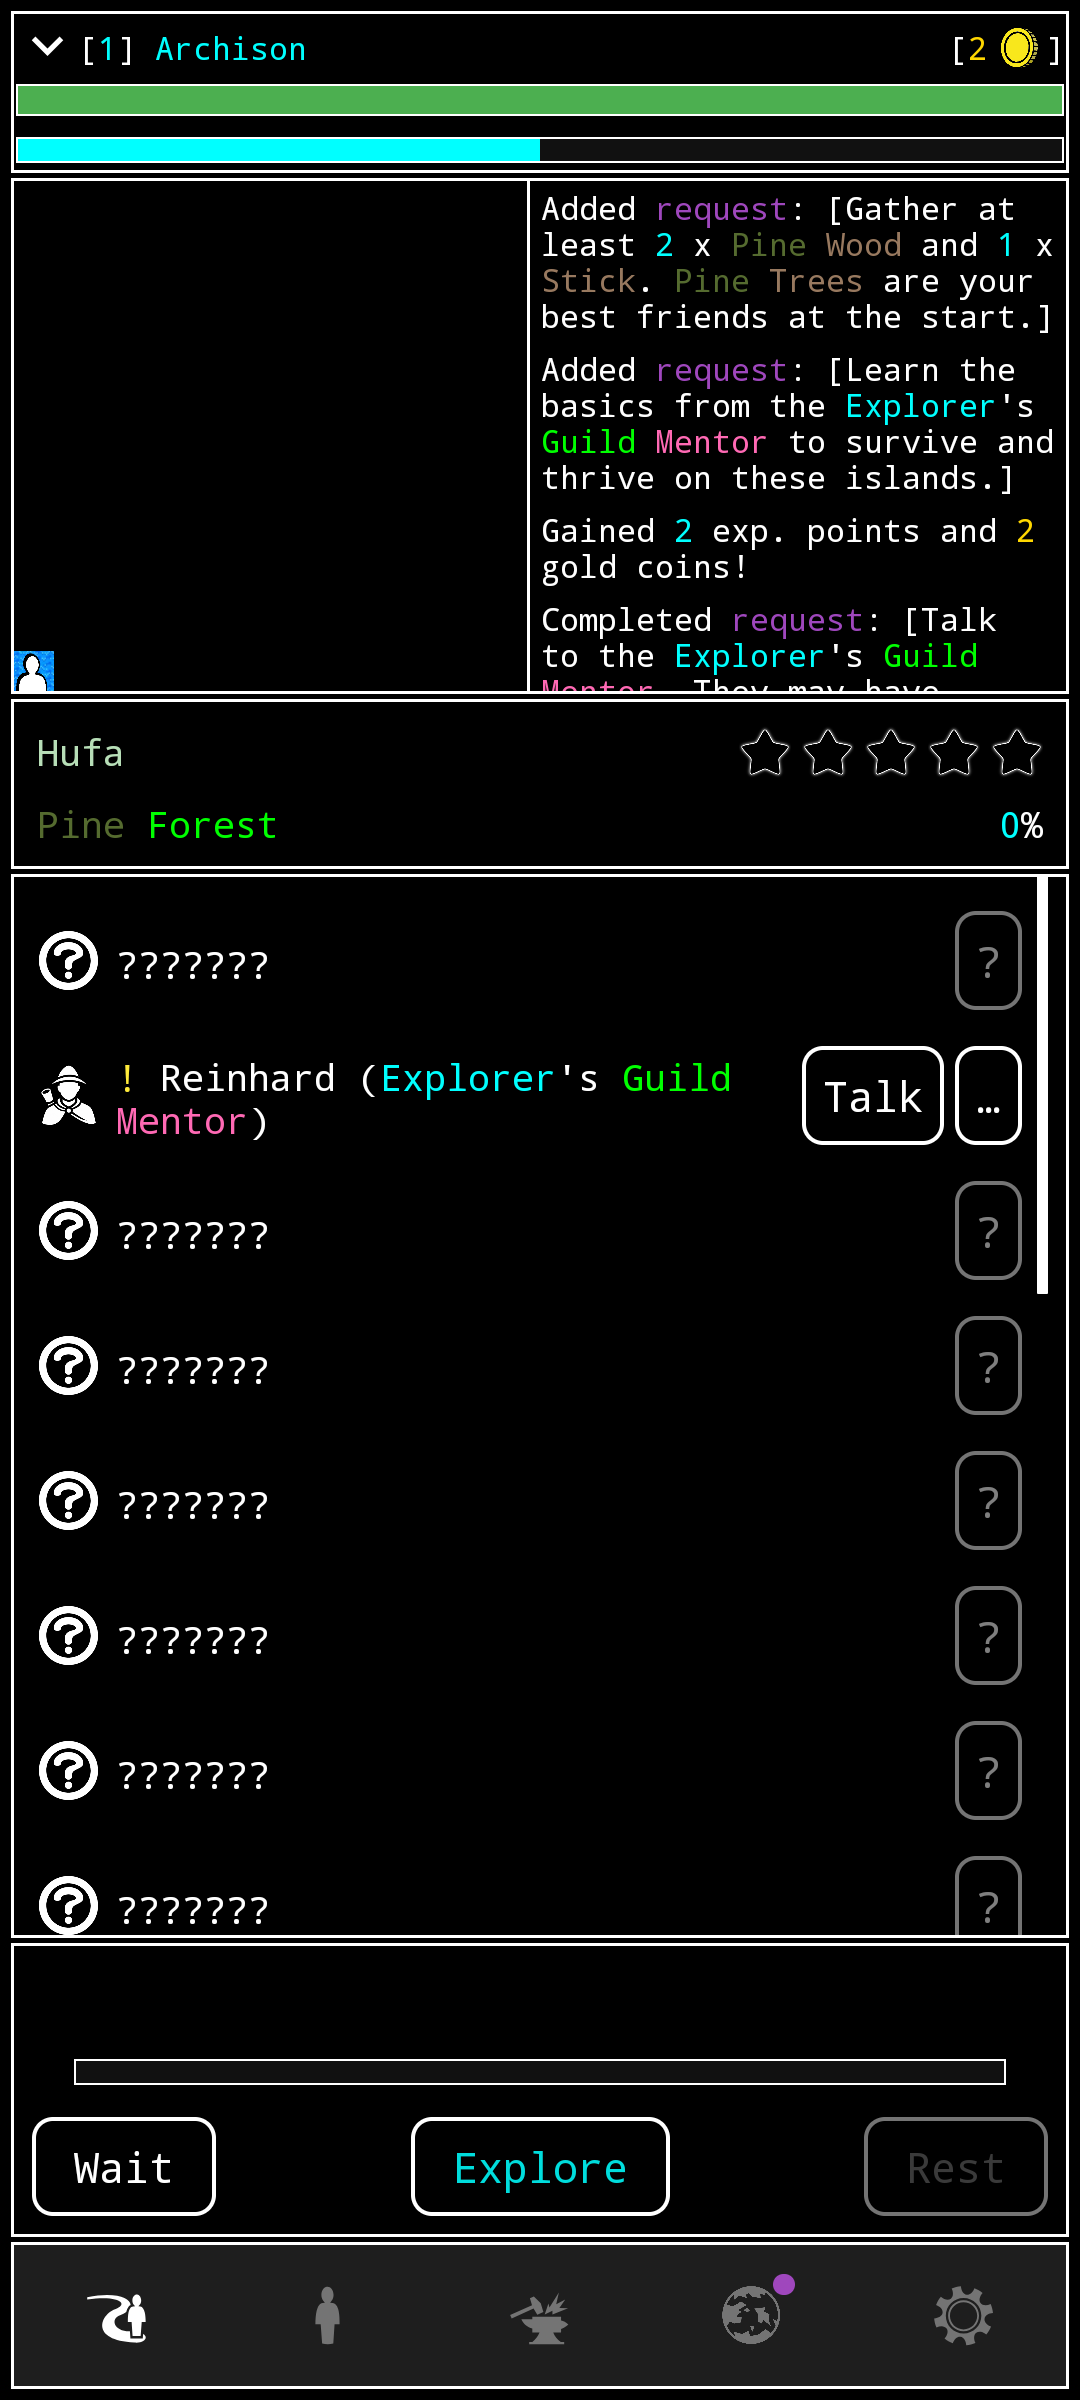
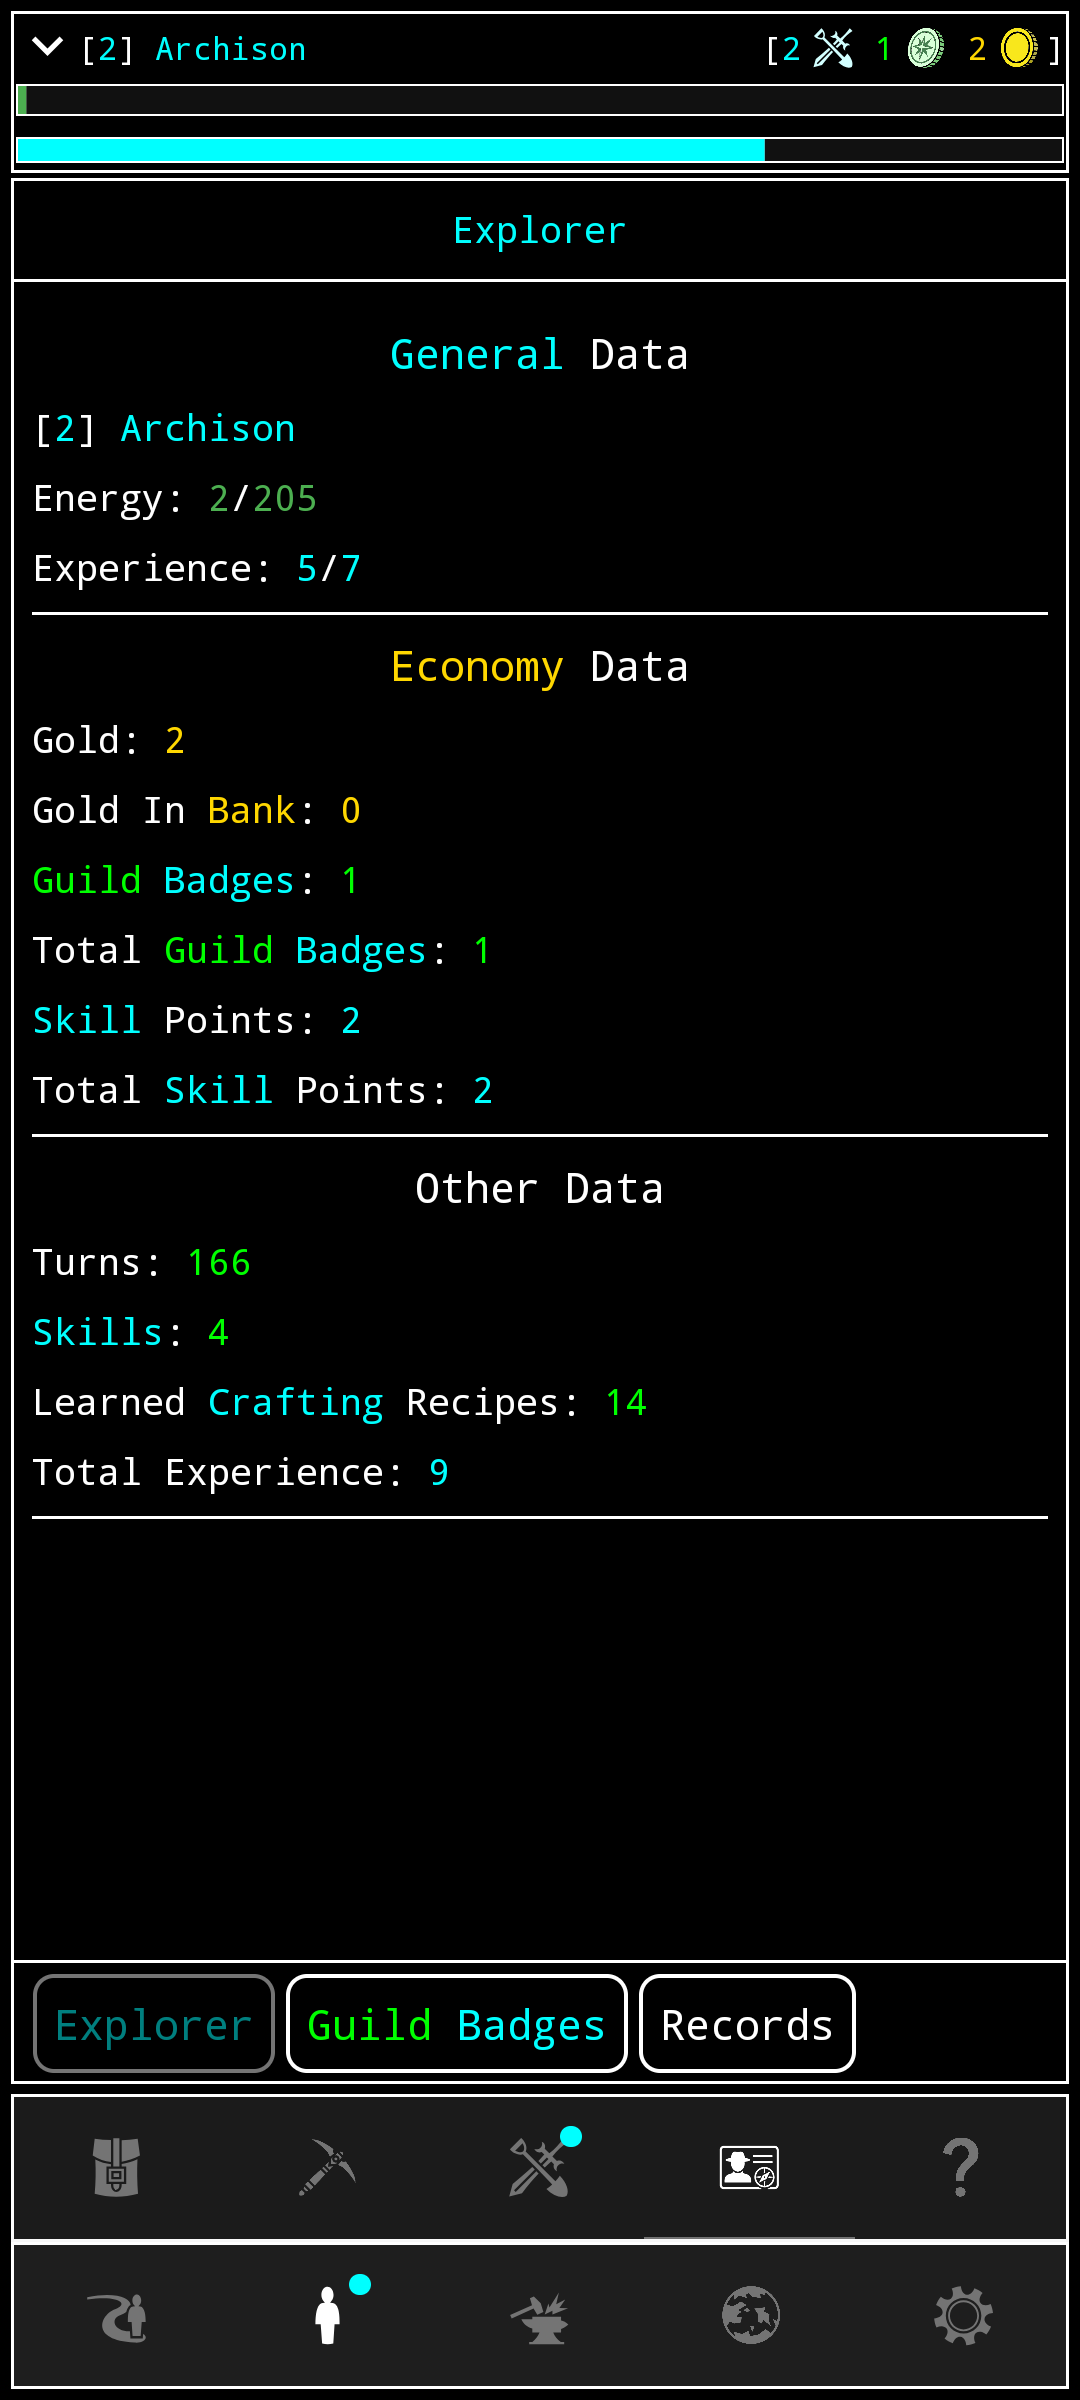
Top left: Your level and name (
[1] Archisonin the picture)Top right: Your gold (
[2 🪙]in the picture).- Later, you’ll be able to see other things there like your Guild Badges, your Equipped Food, or your Skill Points next to it.
The two bars right after that indicate your Energy (green), and your Experience (cyan).
Next is the map and output section.
The map is just illustrative and shows where your character is while Exploring, as well as the contents of the island you’ve discovered.
The output section shows the latest messages from the game (actions performed, items obtained, warnings, etc.). Useful to check if you missed something.
The next element is the general Island information:
On the left: the Island name (
Hufain the picture) and its Island Type (Pine Forestin the picture)On the right: the Island rating (the five empty stars in the picture), and the explored % (
0%in the picture)
Then we have the Island content section which shows the things there are in an Island.
- The unknown things are shown as question marks, until finding them (in the picture the Explorer’s Guild Mentor has been found upon arrival on the first Island).
The next section contains the Exploration actions:
The Wait button, which waits for a single turn to pass.
The Explore button which is the main action you’ll do upon arriving to a new Island. When you tap on it, it will start auto-exploring the Island, and update the Island content section with your findings.
The Rest button, which allows your character to rest and recover their Energy.
The empty progress bar of this section shows what action you are currently doing. For example, while Exploring it will show
Exploring…, while Chopping a Tree it will showChopping…. Depending on the actions, it may display the Tool you are using and its uses left (if you have one equipped). More on that on the Your First Steps.
Last but not least is the bottom navigation bar which allows you to navigate to all the different sub-screens of the game.
The first button is to get to the screen we’ve just described here.
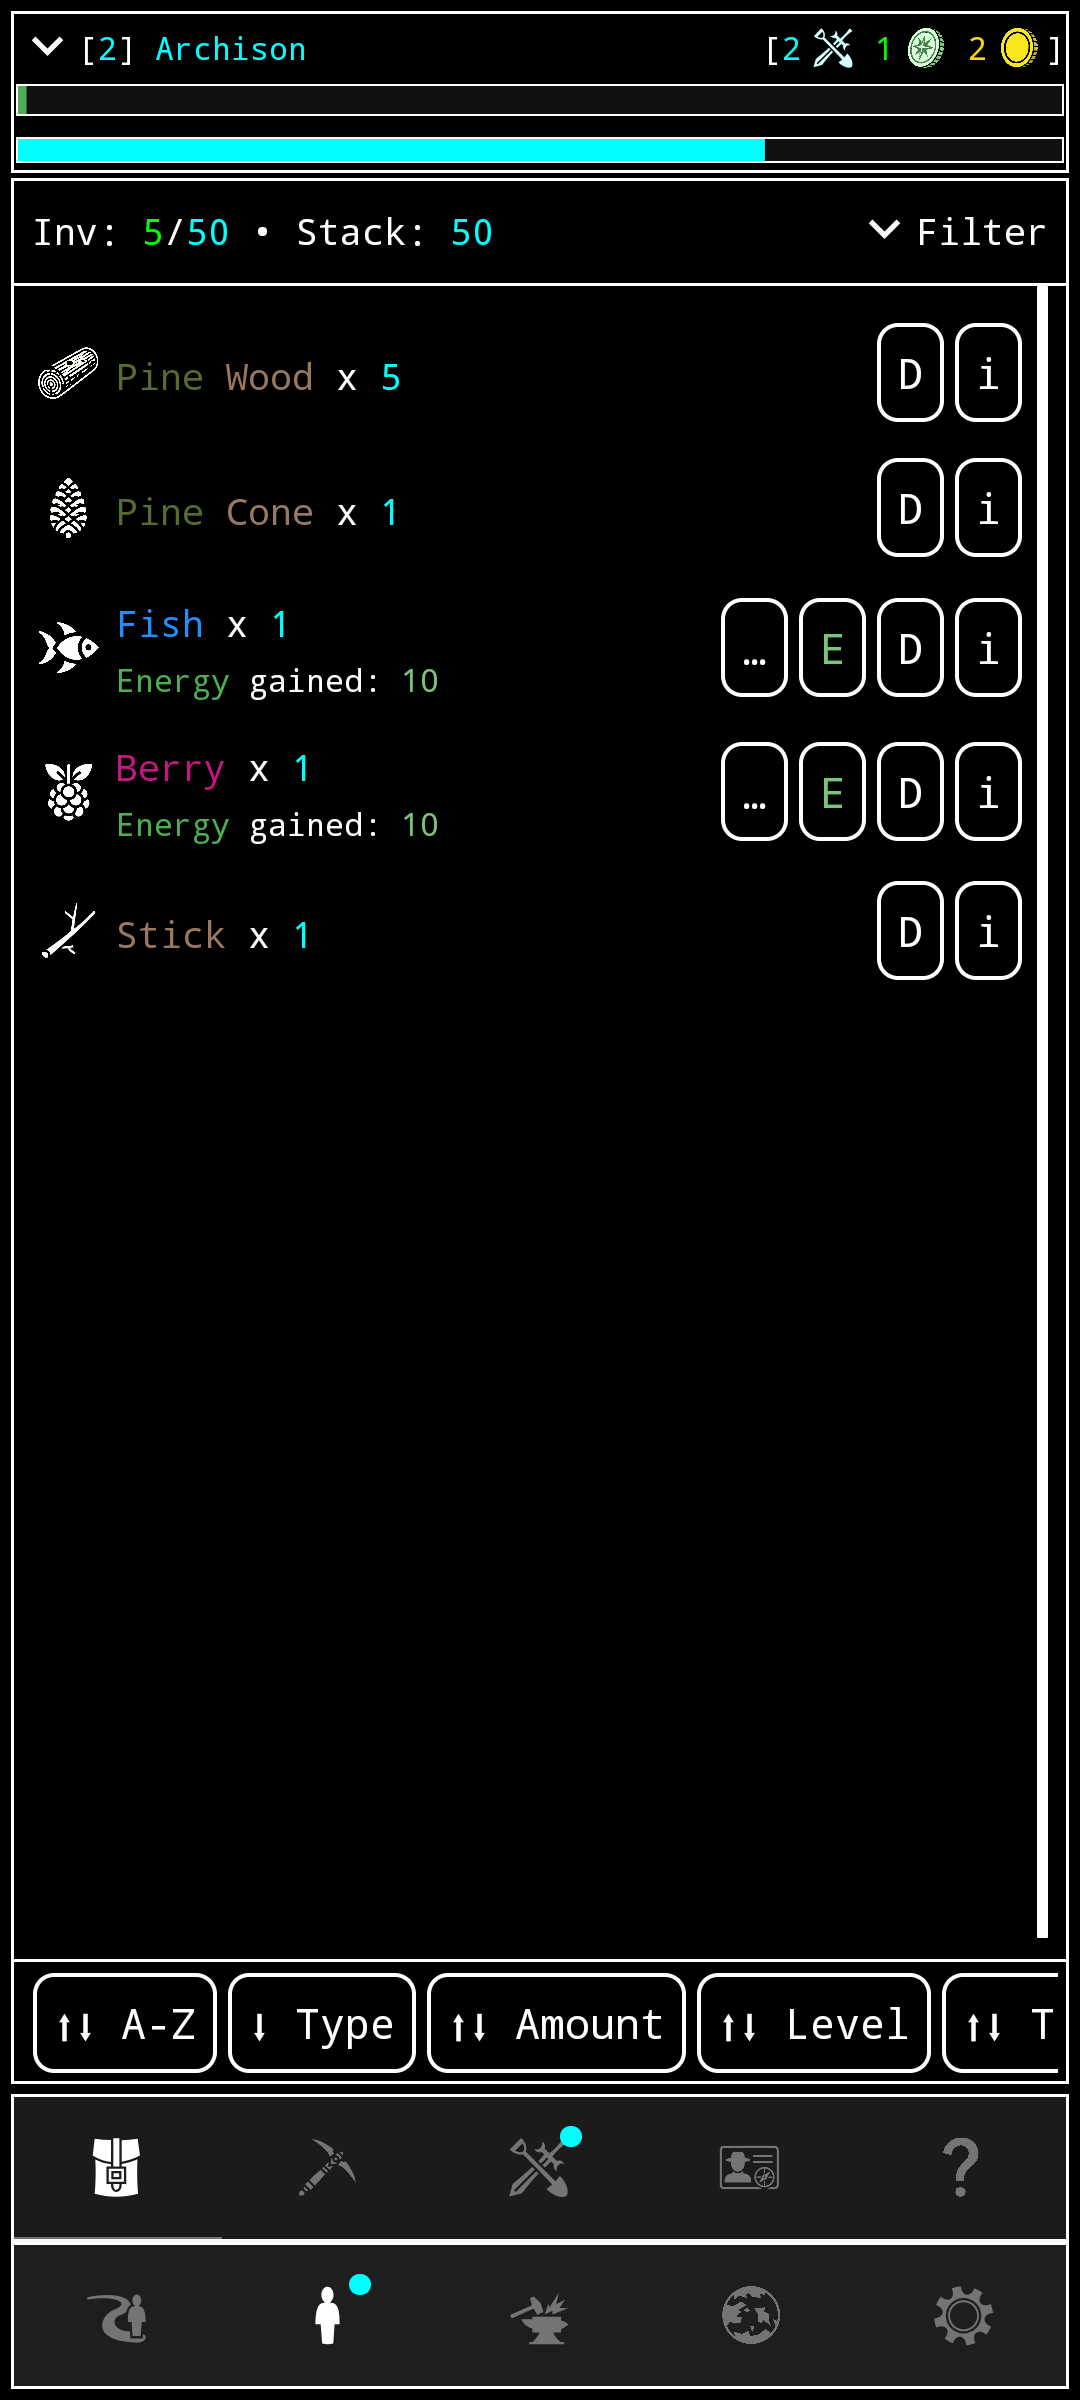
The second one opens the Explorer sub-set of screens, starting with the Explorer’s Inventory.
Inventory: Shows all the items you currently have.
- You can Filter and Sort them by different criteria, useful when you have a lot of items later in the game.
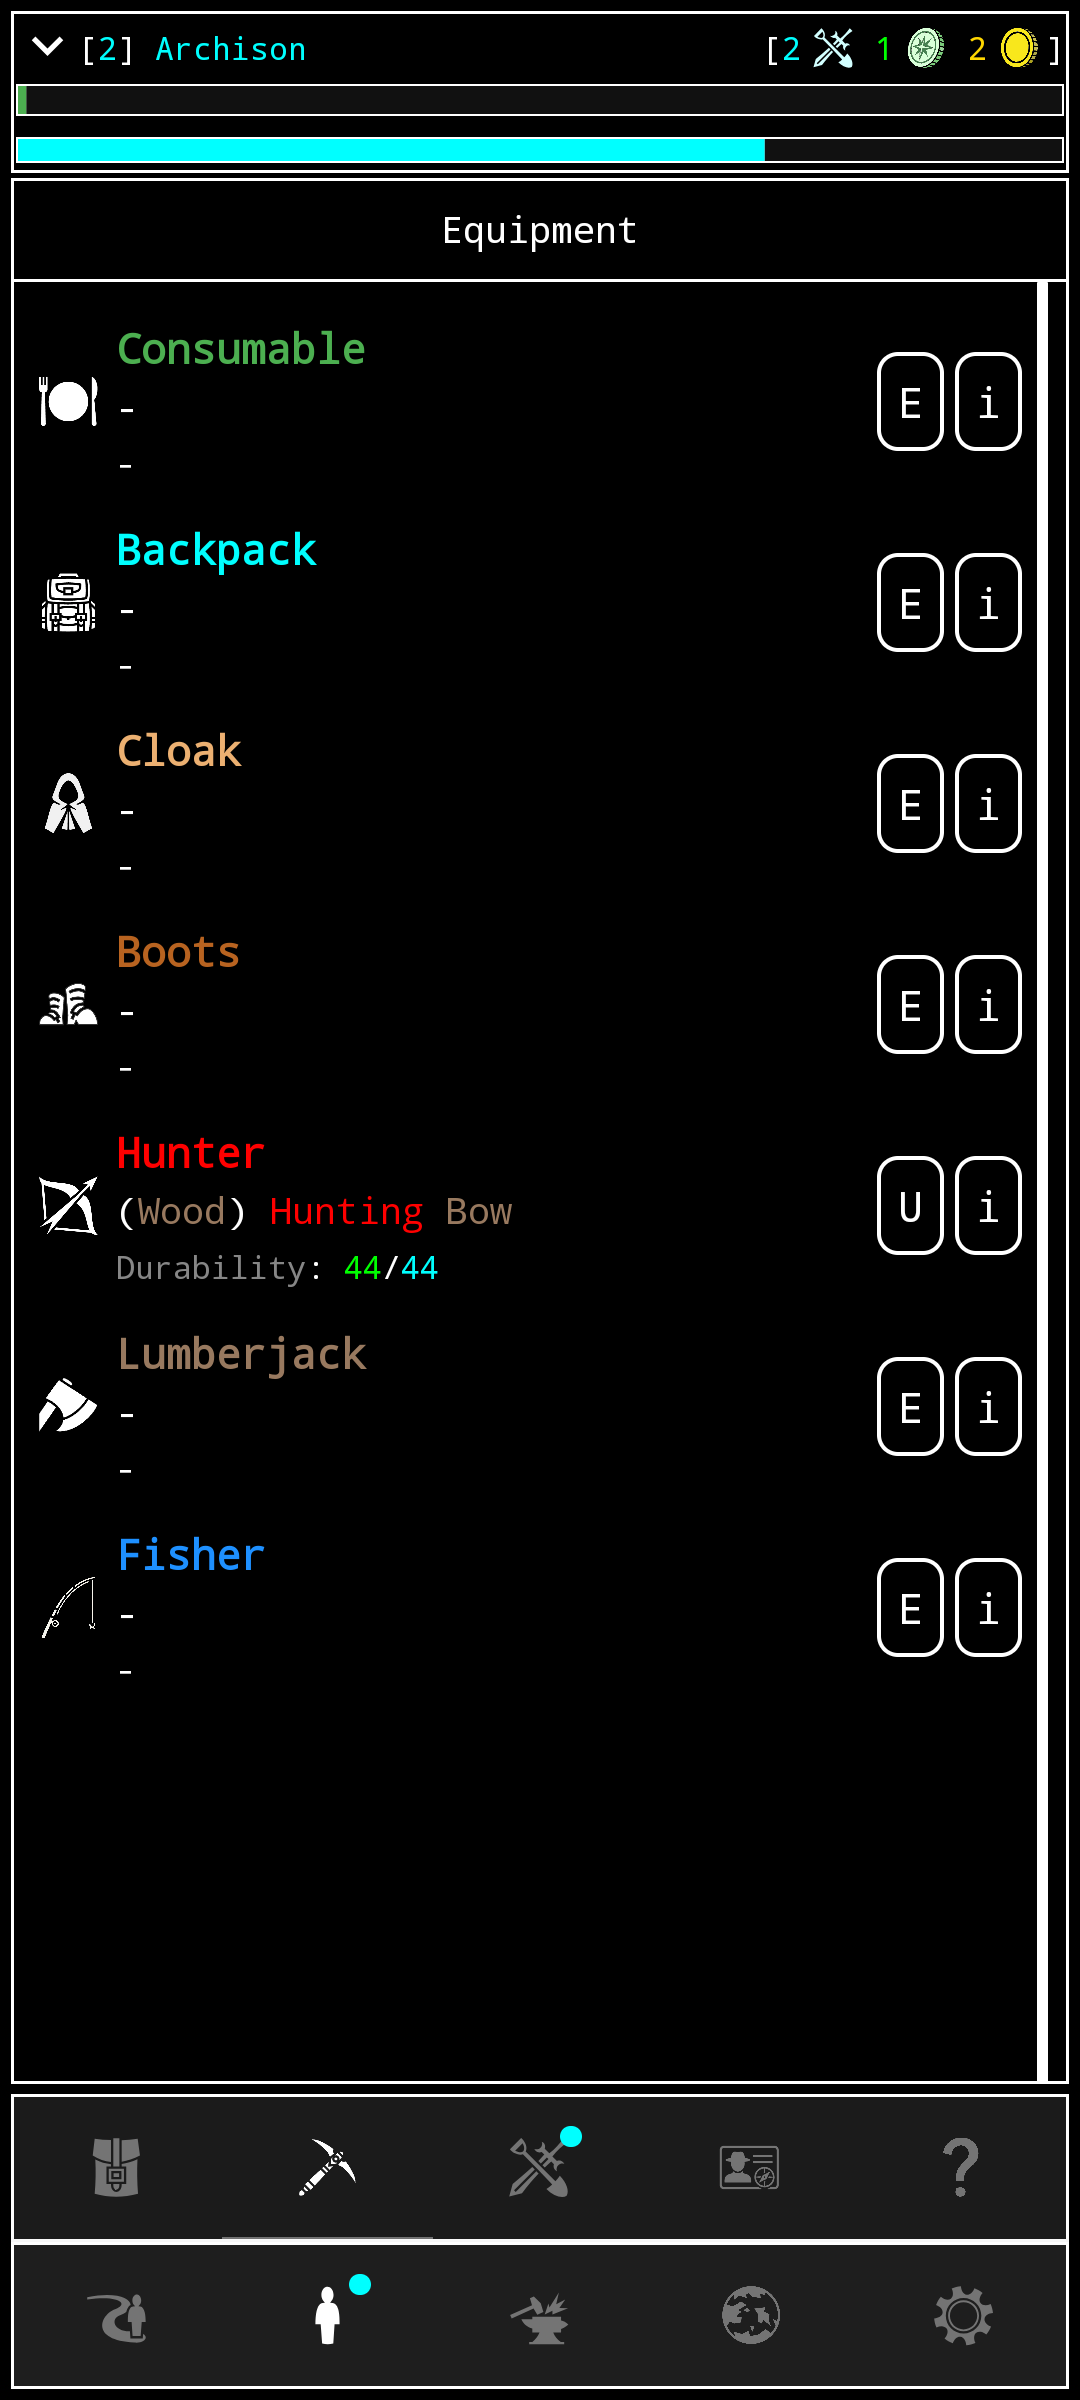
- Equipment: Shows your current equipped items (Food, Tools, Cloak, Boots, Backpack, and more…)
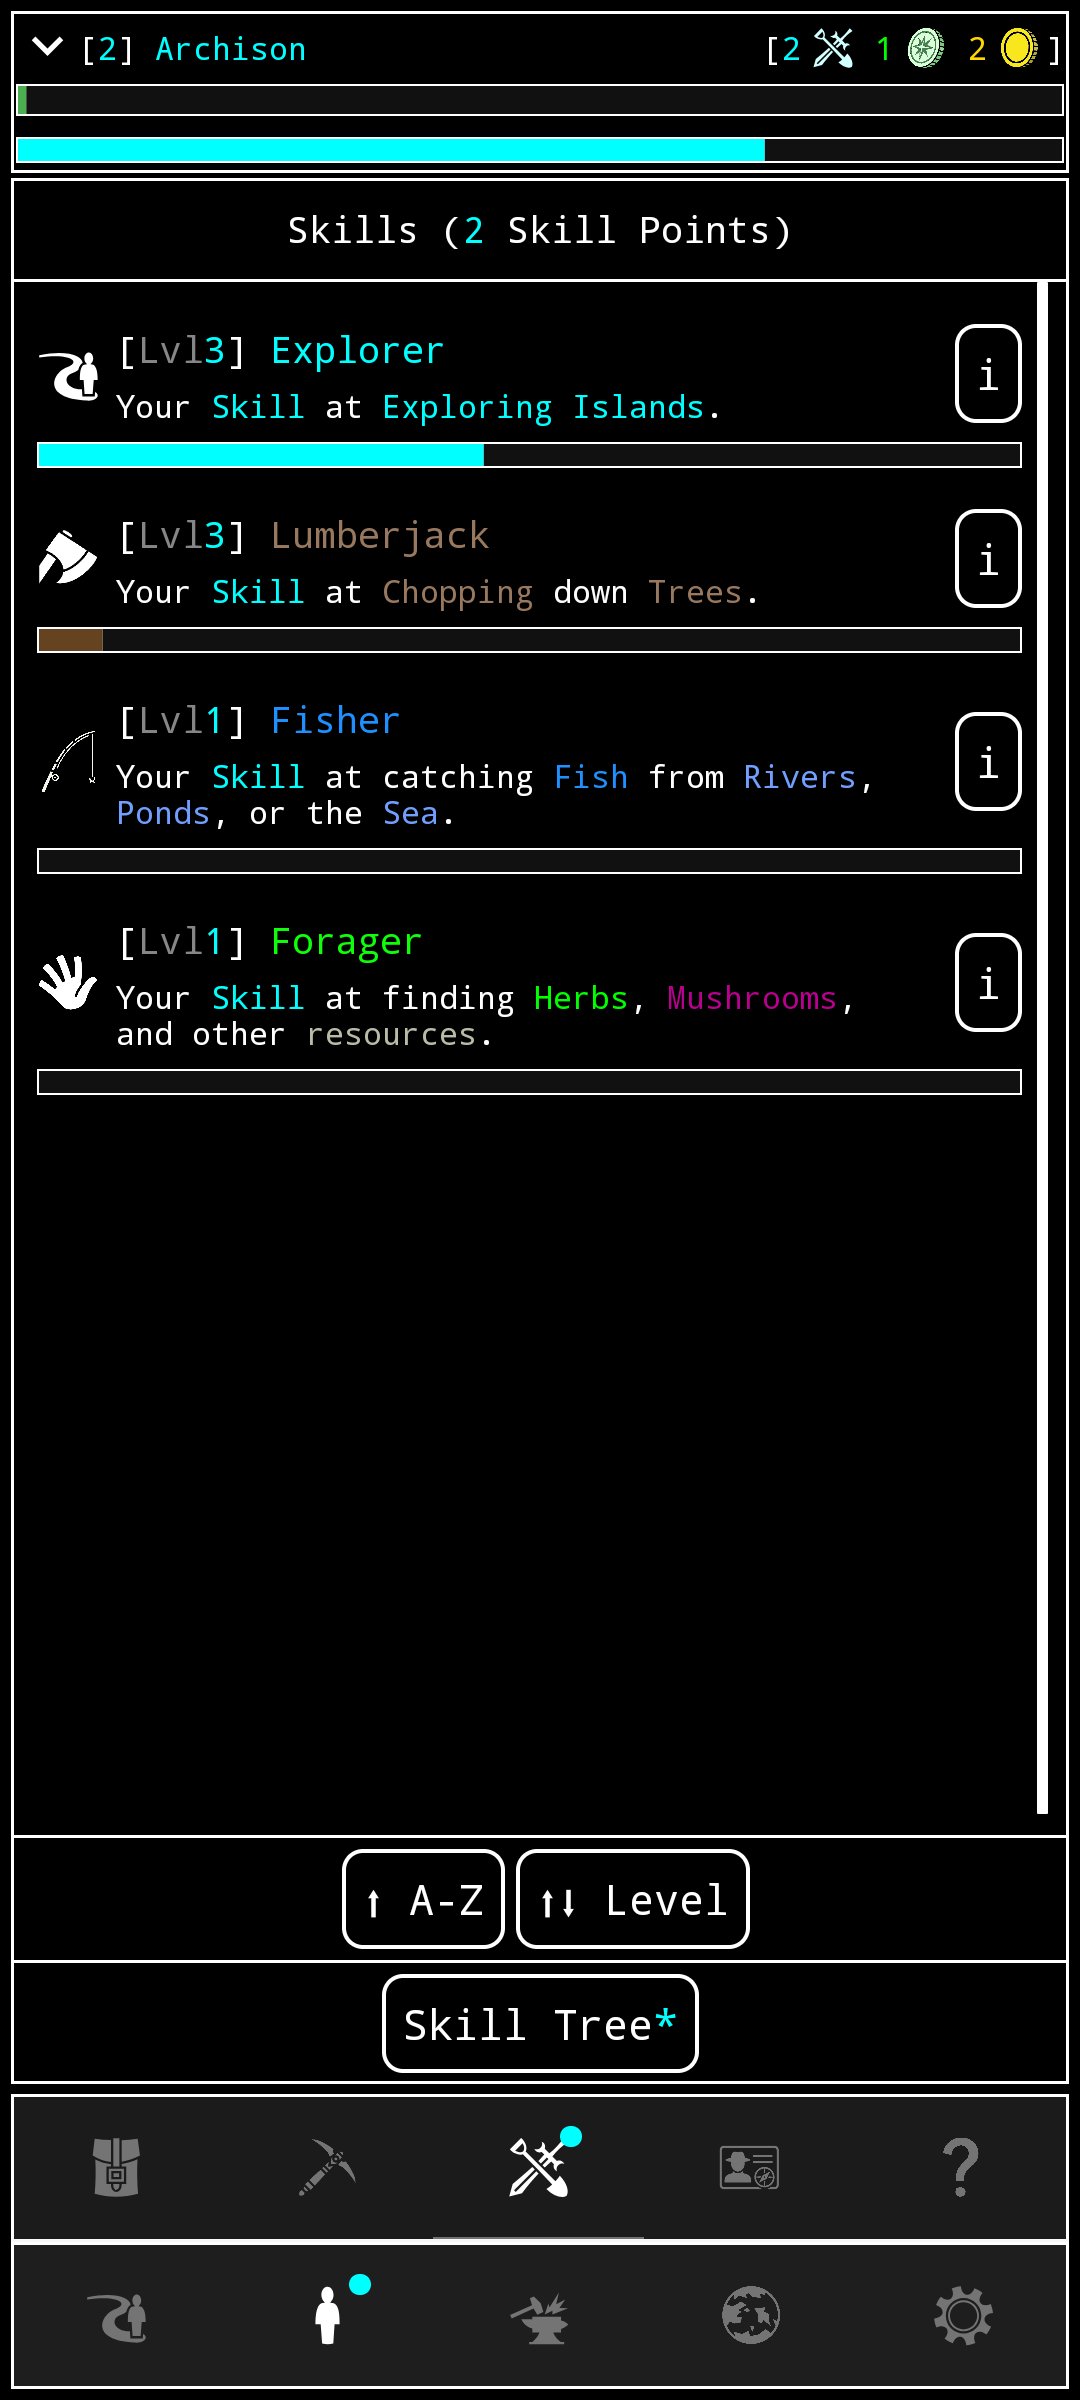
Skills: Shows your currently known Skills
Some of them are automatically learned and improved, like the Gathering Skills (Chopping, Cutting, Harvesting, etc.), and some of them are unlocked spending Skill Points on the Skill Tree, accessed from this screen.
Skill Tree: Spend your Skill Points wisely on this screen to unlock very useful Skills that will make your adventures easier. Tip: Once unlocking a Skill from the Skill Tree, most of them can be improved from the Skills screen spending more Skill Points on them.
- Explorer: Shows all information about your Explorer, starting with general stats, and some sub-screens showing extra information (Perks, Guild Badges, Records, etc.).
The third button on the bottom navigation bar is to access the Crafting Screen
The Crafting Screen is an important screen on this game, where you’ll be using the materials gathered from the Islands’ resources into crafting better Tools and Equipment, as well as Cooking Food, Brewing Potions, and more.
The Crafting Recipes are learned across the game by buying them from specialized shops, and also found in some places. When you learn a Crafting Recipe, the recipe appears on this screen’s list.
To Craft an item you need to have the proper materials. In the list you can see what ingredients are needed vs how many you have. Navigate to the specific Crafting Recipe you want to Craft by tapping on the item’s Craft button.
Once inside the recipe screen, you can tap on the Craft button (it will be disabled if you don’t have the required materials). The materials needed will be consumed and you’ll obtain the crafted item.

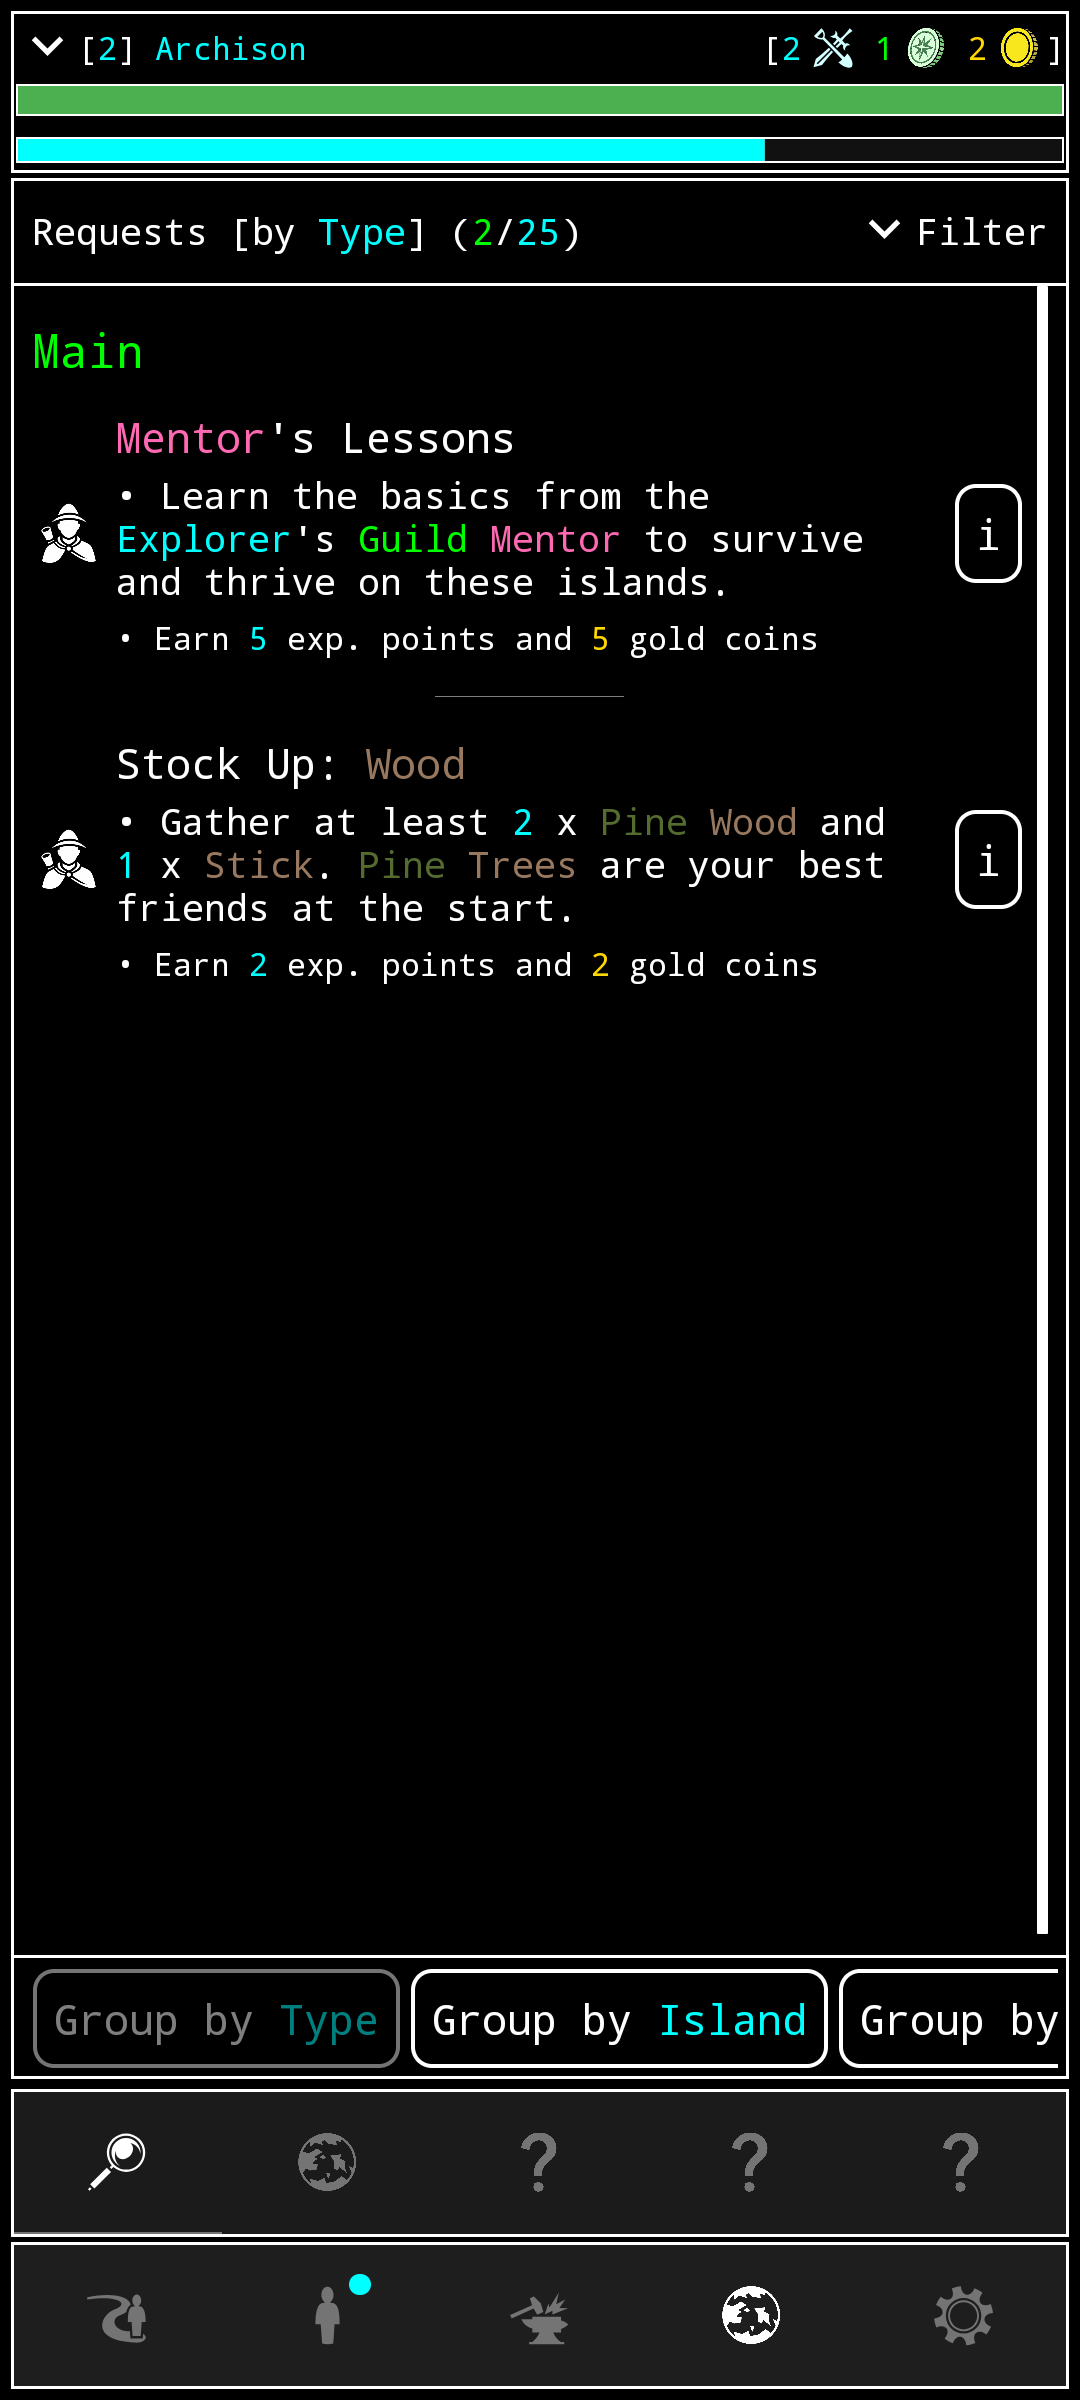
The fourth button is the World Screen, which allows you to access:
- Quests Screen: You can keep track of your Quests here (e.g. Main Story, Settlers, etc.)
- Island List: You can see the list of Islands you’ve discovered so far, and all their details.
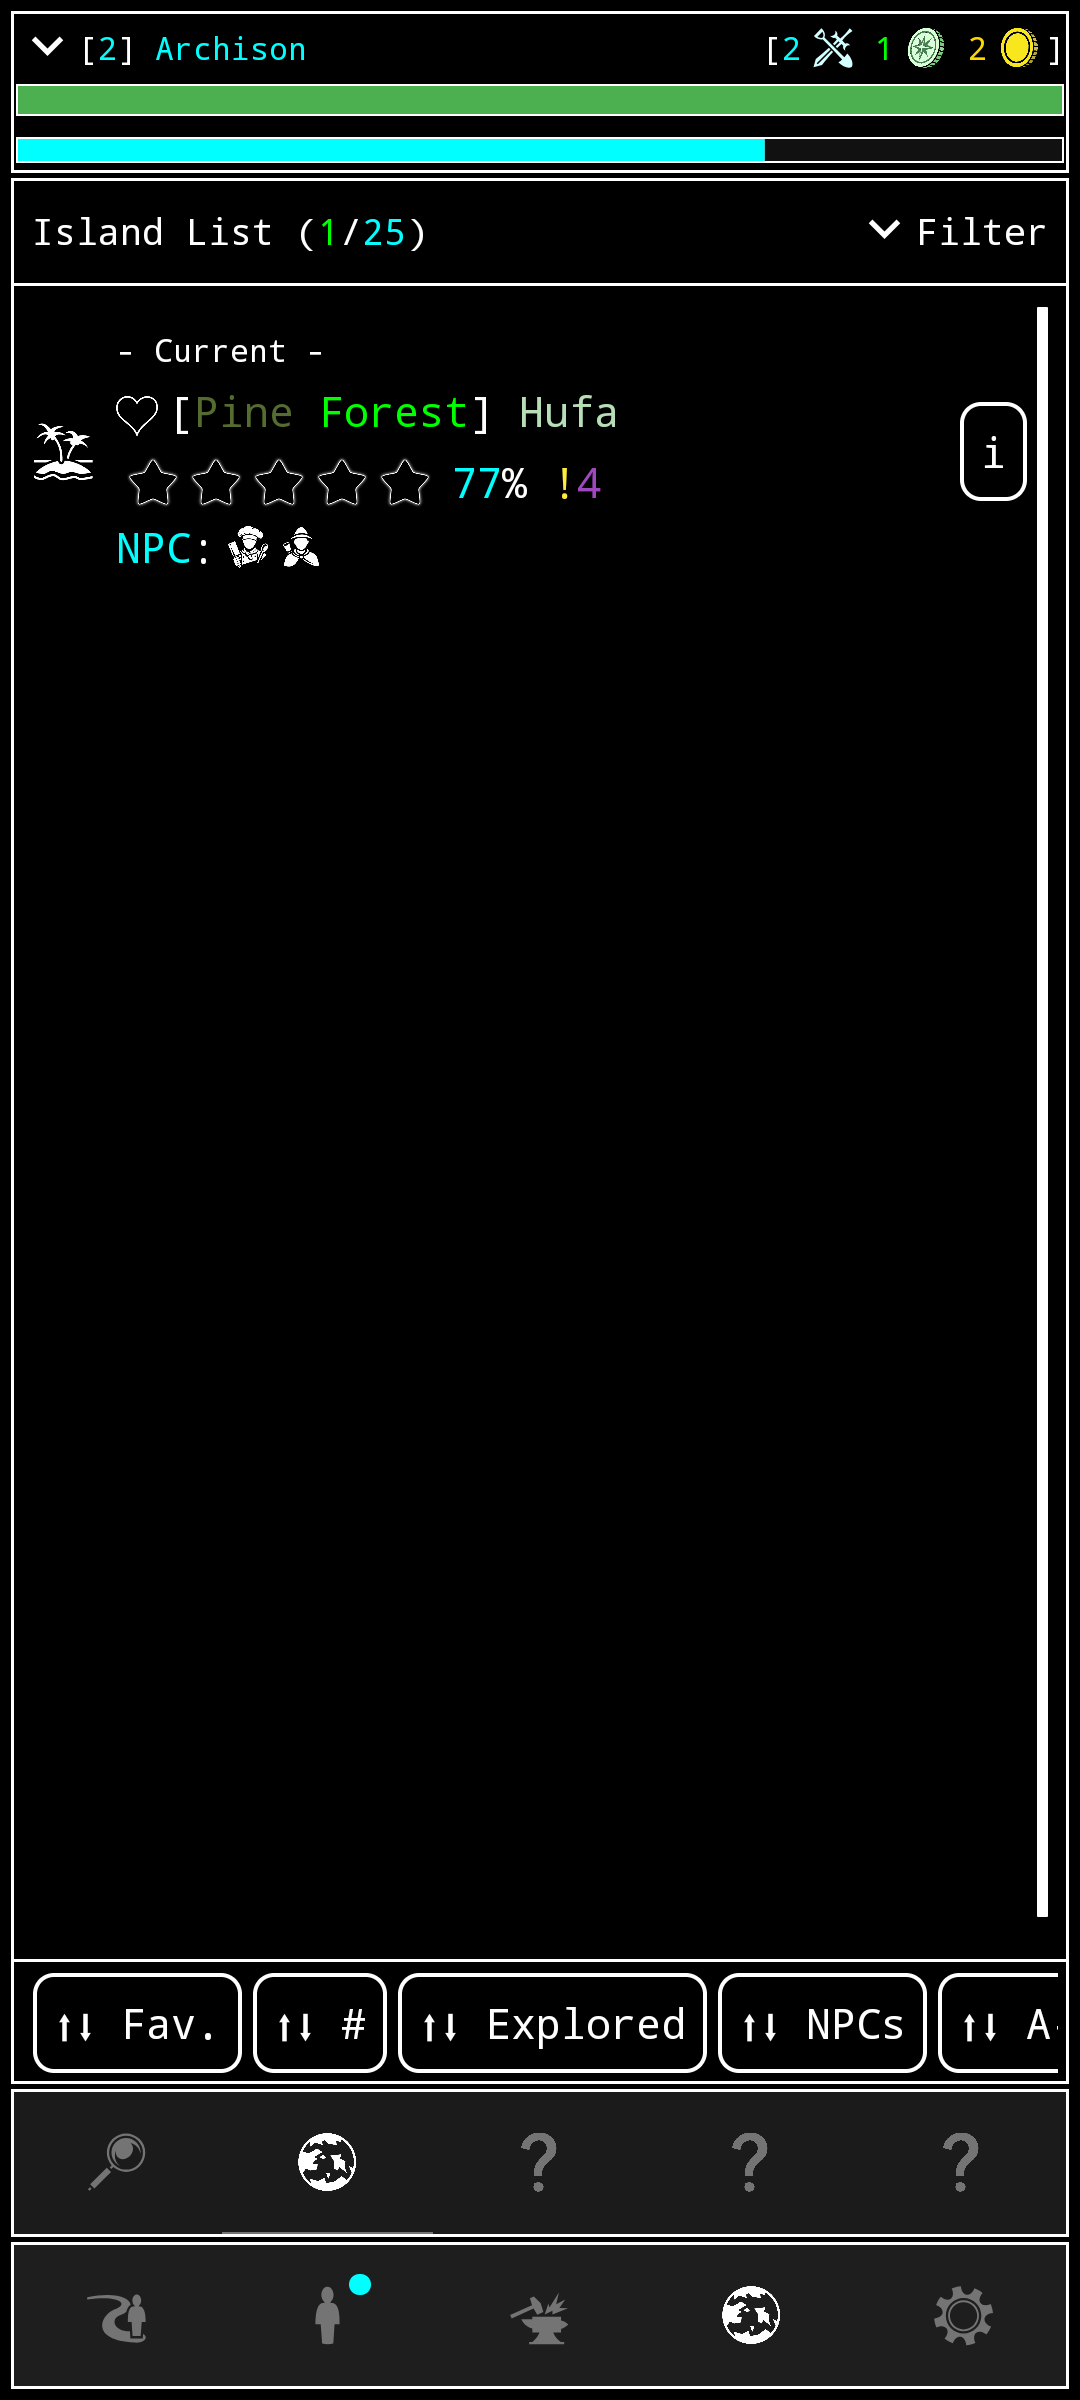
Some other sub-screens here are locked at the beginning of the game and are unlocked as you progress in the Main Story. No spoilers here! 🤫
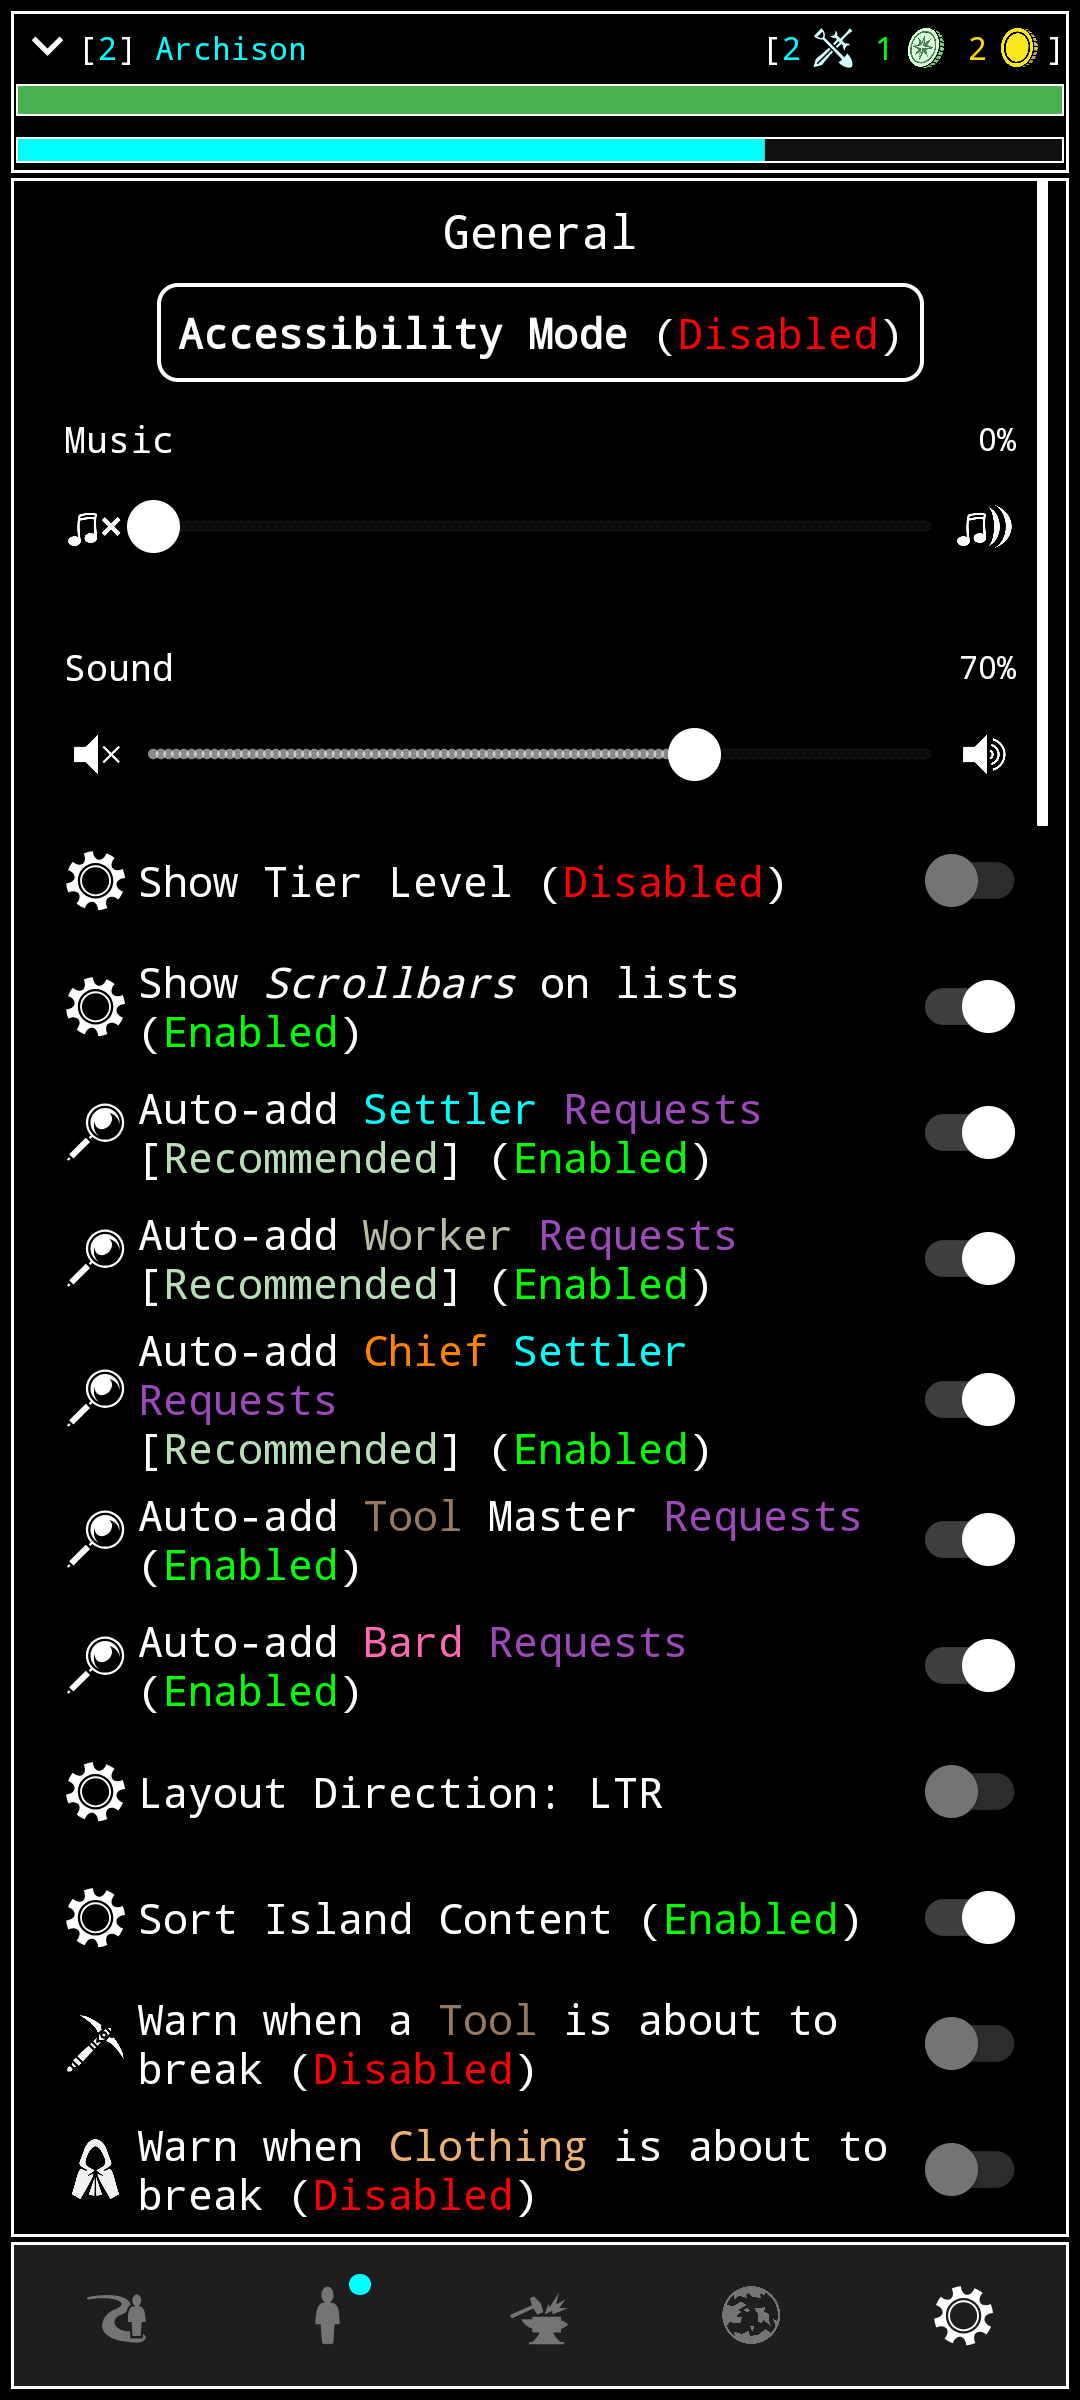
The last button is to access the Settings screen. There you can adjust a bunch of things to adapt the experience of the game to your own taste.
And that’s an overview of the main screens of the game!
There are more screens (like Shops, and other types of buildings, as well as places to discover…) but since this is the How To Play section, I tried to leave it spoiler-free! 🤫
Next: Your First Steps